Sunday, March 20, 2005
Notching the transoms
Progress is slow but steady. Our goal is not to have marathon building sessions, but to do a little every time. This should help prevent us from getting burned out on the project.
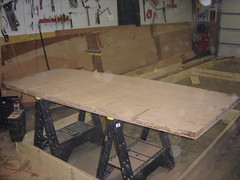
Yesterday we put notches in the transoms. The notches are where the stringers will eventually be placed.
Putting the notches into the stringers is a relatively precise process. First, we ran chalk lines from corner to corner diagonally across the transom (in an "X" pattern) in order to find the center of the transom. Next, we measured top corner to top corner, marking the halfway point, and bottom corner to bottom corner, again marking the halfway point. By drawing a line through the three points we measured, we have a straight vertical line from which we can measure where we'll put the stringer cutting points.
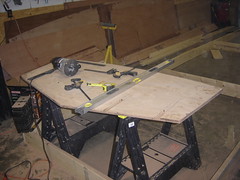
In order to find the stringer cutting points, we measured out from that center line, using a square, so we were sure the measuring points would be straight and drew lines accordingly. Then we played with the router, notched the transoms and generated a lot of sawdust.
Click here to see the video summary of what we did.
Sunday, March 13, 2005
A little more progress
Our plan is that we do a little bit every week. So far, I think we've done something every weekend, but we haven't posted after every weekend's work, and the work definitely hasn't warranted a picture or video every week. This week is one where pictures, videos and long posts would definitely constitute overkill. We've started building the construction frame, on which we'll actually set the boat frame and build the hull. Nothing too exciting. When the frame is completely constructed we will take more pics and do a video giving a thorough synopsis of what's been done and the labor involved. Stay tuned for further developments.
Tuesday, March 08, 2005
Take your time when you lay the tape
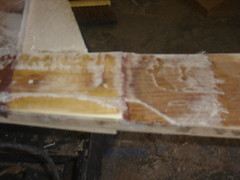
It's best to take your time when you set the fiberglass tape on the joints. If you fail to adequately saturate the tape with epoxy, or if you fail to adequately set the tape onto the wood, the tape won't bond well to the wood, as shown in this picture.
It's really not a big deal to correct this problem; all we had to do was cut away the tape that didn't bond to the wood, feather the edges and lay down another piece of saturated tape... but it would have been nice to have gotten it right the first time.
It's really not a big deal to correct this problem; all we had to do was cut away the tape that didn't bond to the wood, feather the edges and lay down another piece of saturated tape... but it would have been nice to have gotten it right the first time.
Finished the Stringers
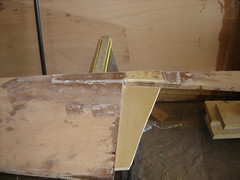
Greg and I talked about my concern with the weak stringer joints, and he came up with a solution. But then again, Greg's an engineer, so why should I have doubted him in the first place, right? Greg cut out a gusset ("gusset" is a fancy-schmancy word for "piece of scrap wood designed to hold our stringer together temporarily") and screwed it to the stringer, providing a great temporary brace. The gussets will stay on the stringers until we're ready to set them in place.
In addition to adding the gussets, we cut off the excess fiberglass tape and lightly sanded both sides of the stringers, mainly focusing on smoothing out the fiberglass joints.
If you'd like to see a quick video synopsis of the day's work, click here.
In addition to adding the gussets, we cut off the excess fiberglass tape and lightly sanded both sides of the stringers, mainly focusing on smoothing out the fiberglass joints.
If you'd like to see a quick video synopsis of the day's work, click here.
Subscribe to:
Posts (Atom)