I received a message from one of the administrators at bateau, requesting that I clarify something about the errors we're experiencing.
There are three possible places where these fitting problems could be occurring. Those places are the plans themselves, the kit, or how we as builders are executing these plans (or any combination thereof). At this point I honestly don't know the root cause of the issue. I will say unequivocally that the administrators at bateau have been incredible about working with us when we've experienced problems, and I will clarify for the record that it's highly possible that the issues are due to what we're doing and how we're doing it, as opposed to it being a problem with the plans or the kit we purchased.
Please do NOT take the contents of this blog as any intent to question the quality of the plans that bateau produces, nor the kits that they manufacture. This blog is designed to look at the building process... nothing more.
Monday, September 19, 2005
Sunday, September 18, 2005
A Nod to the Designer/Architect
In my last post, Dr. Howdy has (quite rightly) recommended that I give some credit to the designer/architect of this fine boat. Greg purchased the plans from www.bateau.com. I will work to find out more about the individual who designed this boat and will post as the designer deems fit.
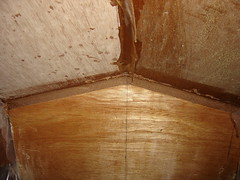
Front Transom - Inside
This is the front transom from "inside" the boat. Again, the purpose of this round of work was to fillet the front and rear transoms. If you notice at the top center of this pic, the thickened epoxy dripped. Why??? Because we were too lazy to run to the store for good duct tape. we used package tape instead, it didn't hold, and the peanut butter oozed through. This will cost us a lot more work in the long run, when it's time to sand.
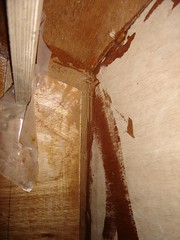
Filleting
In this picture, we are filleting the gap between the hull and front transom. In the picture you will notice the large gap filled with thickened epoxy. You see the stringer in the left-top of the picture, and you see that the stringer is covered with plastic, in order to prevent the stringer from sticking to the transom or hull during the epoxying process.
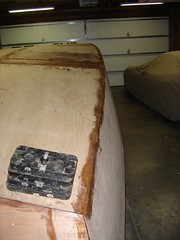
Another Shot of the Hull
In this picture, we've still got weights on the front end, because we haven't filleted the inside transom joints with thickened epoxy yet.
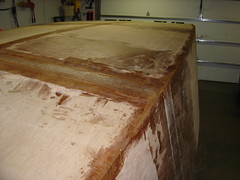
Coming Along Nicely
We've got the joints epoxied, and the zip ties are pulled out. You may notice a couple of sloppy tape joints. We'll need to fix them before we glass the whole boat. If you click on the picture, you'll be referred to flickr, where you can see a larger picture, and a note pointing out the sloppy tape joint.
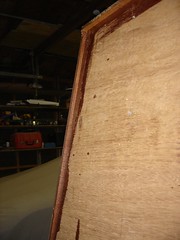
Front Transom Overhang
The overhang on the front transom is more pronounced than the rear transom. Again, the hull extends past the front transom.
Though this makes for a bit more work, I'd rather have the pieces measure too large than too small. It's a lot easier to cut away the excess than it is to build on a piece that's too short.

Though this makes for a bit more work, I'd rather have the pieces measure too large than too small. It's a lot easier to cut away the excess than it is to build on a piece that's too short.
More Flaws in the Plans
This is a picture of where the hull and rear transom come together. If you look, you can see that the hull extends past the transom. In addition to this, we've discovered that the rear transom was also too wide, and we've had to shave some width from the port and starboard sides of the rear transom.
Subscribe to:
Posts (Atom)