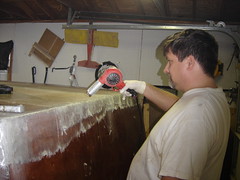
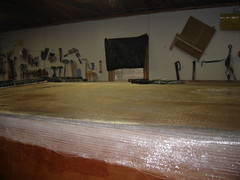
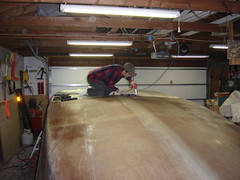
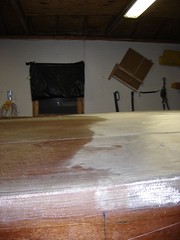
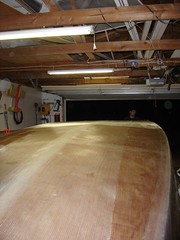
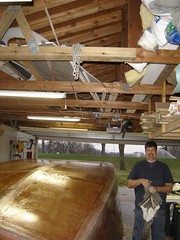
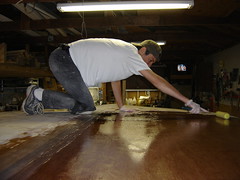
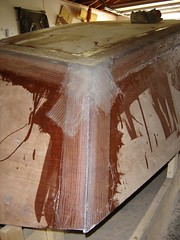
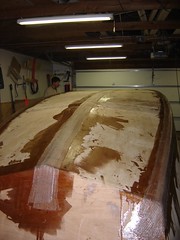
There were a couple of areas on the rear transom where the glass didn't lay down to our liking. Greg decided to see if heating the epoxy in this area would work. After a few minutes, we discovered that the epoxy got very thin and dripped a lot. This tended to starve the fiberglass, didn't help the fiberglass adhere to the plywood at all, and the epoxy that remained in the fiberglass had dried enough to touch after a mere five additional minutes.
In short, I don't recommend using a heat gun on uncured epoxy. It's a good way to give yourself a second chance on cured epoxy though. In fact, I'd call it a sheer stroke of genius on Greg's part.
Tuesday, November 29, 2005
Glassed Bottom
The rest of the bottom has been glassed. As I write today's entry, we're waiting for the epoxy to completely cure. This weekend, we'll touch up any areas that need it, do a little sanding, and lay glass on the sides and transoms as needed.
Weighting the Transition Area
To help ensure a good bond in the area where we ran out of epoxy, we laid a slightly thicker layer of epoxy, then laid a sheet of plastic over the transition area, laid a piece of plywood over all of that, and weighted it down. From the transition point on, we epoxied as normal.
Quick Heating and Quick Cooling
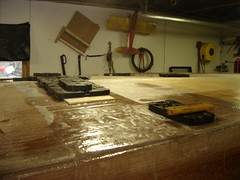
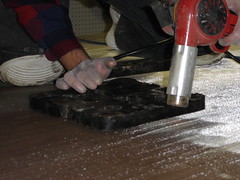
As mentioned in the last entry, we used a heat gun to heat up the stiff fiberglass, and soften the epoxy. Immediately upon softening, we laid a cool metal weight on top of the newly-softened fiberglass. This helped the fiberglass lay flat as it should.
As we went, we learned that we could run the heat gun in front of the weight, which would heat the fiberglass and epoxy, and we could immediately slide a weight behind the heated area. this would ensure the area would lay flat. I've gotta say, it was a pretty clever trick.
As we went, we learned that we could run the heat gun in front of the weight, which would heat the fiberglass and epoxy, and we could immediately slide a weight behind the heated area. this would ensure the area would lay flat. I've gotta say, it was a pretty clever trick.
An Answer to our Glassing Problem
We ("we" being Greg for the most part) thought about possible solutions for our problem on how to get the partially-wetted fiberglass to properly adhere to the hull. After a week or so, Greg found the answer. We used a heat gun and softened the epoxy in the areas where the fiberglass was bubbled up from the hull.
Friday, November 18, 2005
A Stroke of Luck?
Here's the answer from bateau about our epoxy problem.
---Begin Original Text---
If you can get it to wet out, there should not be any problems. The larger white areas are going to be easy, its the spots that have been half way wetted out that will be diffucult to make right - you will have to really work the epoxy into the glass to wet out the dry fibers.
---End Original Text---
They asked for some close-up pics of the area where we had run out of epoxy, (here are links to the pictures 1 2 3 4 5 6 7) they talked among themselves, and the concensus was that we could probably do it, but it would take work.
Note: These pics are very large. They'll take a minute or so with broadband. If you're using dial-up, make lunch while you wait for the downloads.
Hey, I can handle a little extra work. I was concerned that we'd have to cut the cloth, toss out the stuff that wasn't epoxied thoroughly, sand down the transition area, and relay the back section; which would have cost us several extra hours of work and about $50 to $100 in extra fiberglass.
Greg came to the conclusion that we really did have enough epoxy for the job, but we used a grout float instead of a squeegee when we applied the epoxy. After looking at the boat, there's little doubt in my mind that he's right. I agreed with his assessment when I saw how much epoxy had run down the side of the boat. Using a squeegee was easier and faster, but it cost us extra in the long run. Greg had to buy more epoxy than originally anticipated, and it's going to cost us a little extra work. I wouldn't disrecommend using a grout float for the big jobs; in fact I'd still recommend it. But I would also highly suggest that you double your estimate when you consider how much epoxy you'll need for the job. The worst that will happen is that you end up with extra epoxy, which can be used on your next job.
As usual, I'll take more pictures (heck, maybe I'll do a video... we're about due for one) and update you on the progress.
Sunday, November 13, 2005
A Significant Setback on our way to a Major Milestone
We ran out of epoxy. Between applying the base coat to the bare wood, and the bonding coat that bonds the glass cloth to the hull, we went through well over three gallons of epoxy.
This could have some major unintended side effects for us, but I'm not sure yet.
The front half of the boat is fine. I'm not so sure about the back half. Greg thinks that we can just get more epoxy and continue where we left off. I'm concerned that we'll need to rip up the cloth that didn't get bonded and reapply the cloth. Here's what I'm thinking...
We've got the base layer of epoxy applied to the bare wood. It's also ever-so-slightly bonding the fiberglass cloth to the hull. But I'm concerned that it's not quite right. I'm going to ask Jacques over at the boat forum and get his input. I'll let you know when I get the answer.
Glassing the Hull
This picture shows the front half glassed and epoxied. If you look closely at the picture, you can see the line where there's no top layer of epoxy.
Prepped Hull
The hull is now prepped. A base coat of epoxy has been applied to the entire exterior of the hull. Isn't it shiny?
Prepping the Hull
Yesterday we started the process of laying fiberglass cloth on the hull. Here's a picture of me rolling a base coat of epoxy onto the bare wood of the hull.
Finished Taping the Seams
Greg got the front and rear transom joints taped. The corners have six layers of fiberglass on them. They should be able to withstand a direct blast from a nuclear warhead.
Sunday, November 06, 2005
Another Minor Milestone
We haven't done much the last couple of weeks, because my wife and I went on our honeymoon. Greg did a little work while I was gone, but not a whole lot... mainly a few last-minute things before doing what we did last night... laying tape!
That's right, we laid tape on the three long seams. Greg said that he'd to the transoms today, so we have not only a good physical bond, but a good chemical bond with the epoxy as well.
That's right, we laid tape on the three long seams. Greg said that he'd to the transoms today, so we have not only a good physical bond, but a good chemical bond with the epoxy as well.
Subscribe to:
Comments (Atom)
