Sunday, January 29, 2006
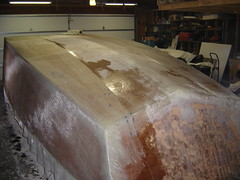
The Outside of the Hull is Glassed!
We reached another major milestone yesterday... we finished glassing the exterior of the hull. Now we're on to the long task of fairing and sanding. Based on our current pace, I expect this to take about three months.
Sunday, January 22, 2006
Glassed Rear Transom
Yesterday we glassed the rear transom. After we glass the front transom (which we plan to do next weekend), we'll be done glassing the exterior. Then comes the fairing.
We've gotten pretty good at laying glass, and have devised a method that lets us lay two layers at once. The first time we did it was a little tough, but through a little trial and error, we've got it down to a science. By doing two layers at once we are saving time and I think we'll have a stronger boat, because laying two layers at once will give us a single chemical bond in addition to the physical bond. It also seems to cut down on the amount of sanding we need to do.
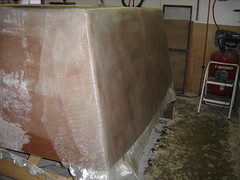
Here's a picture of the glassed side (which we did last week). We glassed the side using the aforementioned both-layers-at-once method, and I'm quite pleased with the results. Glassing the side took us about four hours using this method, and the rear transom took about two hours.
Our double layer method consists of measuring the glass cloth and laying them in place, and laying a coat of epoxy thick enough to saturate both layers of glass. The horizontal surfaces are very easy, but the vertical surfaces are a little more tricky. We've found that it's best to use a roller to work a thick layer of epoxy into the glass at the top, and then slowly squeegee the excess down the side. Make sure to do this very slowly, so the epoxy has a chance to saturate the cloth as you go down. If the epoxy is rolling down the surface as you use the squeegee, you're moving too quickly.
One note: I do NOT recommend doing this double-layer method unless you've got two people for the task.
Saturday, January 14, 2006
I dropped by Andrew Lucking's site today. Andrew is building a VG23 sailboat, but has had to cease construction for the winter. In the meantime, Andrew has found a few cool links that you may find interesting...
Peter Gron is building an Arctic Tern Sloop that promises to be a beautiful lady when she's done. Peter came up with an brilliant way to make the stitches tight at the bow, but I'll let you read his web site and find it for yourself. He's also got great pictures of the jig he built for rolling the boat.
---Blatant lifted from Andrew's page, so I don't have to re-type---
I didn’t mean to but… - Tim Zim is in the midst of converting a fishing trawler into a liveaboard. Tim complains about busting rust the way I complain about sanding. And his “Lady Jane” is 90+ feet!
Ceilydh Under Construction - Evan Gatehouse and family are reconstructing a Woods Meander 40′ catamaran. Any boat project that begins with a chainsaw is okay in my books.
Waterlogged: living on a wooden ship - These folks are living aboard the MV Bowie, a 136 foot former WW II US Navy subchaser, as they renovate her. Something about life on a huge old wooden ship with a hot tub on her stern really appeals to me.
---End Blatantly Plagarized Section---
While you cruise through these sites (hopefully getting ideas and staying motivated about your own project), be assured that Greg and I are still sanding and laying fiberglass on the hull.
Saturday, January 07, 2006
Fiberglass Filler
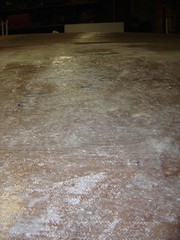
Here's a picture of the fiberglass-filled patch. You see that Greg used epoxy filled with fiberglass particles, which he used to fill the areas he cut out, and blended in with the glass cloth. The strength is solid, and it will undoubtedly work better than the original plan of injecting epoxy into small holes. It's a little more work, but we both agree that it's worth it.
We Re-Interrupt this Program...
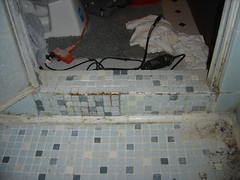
For an update on my shower repair. You may notice that my last update on this was in Mid-December. Since then I have had precious little time to work on the shower, and when I did work on it, the progress was slower for various reasons...
The patch job still isn't re-grouted and re-sealed, but that'll come in the next couple of days. And of course, it's not perfect, but it's designed to be a semi-permanent patch job, not a total reworking.
The patch job still isn't re-grouted and re-sealed, but that'll come in the next couple of days. And of course, it's not perfect, but it's designed to be a semi-permanent patch job, not a total reworking.
Subscribe to:
Comments (Atom)


